• MY BOOKS ON WILDLIFE, GARDENING AND MORE

  • The Wild Excellence

  • True stories of wildlife encounters around the Greater Yellowstone
  • Award winning eBook on Decomposed Granite, tips, how to's, what to watch for
  • Children's book. True stories of a dog and wolves. In a dog's voice
  • Written for dry Mediterranean climates in California, north and south

Natives and Noxiousness

I’ve been lax in writing, between the holidays and just returning from New York City.  Now I’m focused on getting back home to Wyoming, but first I have to install three jobs and the weather here isn’t cooperating.  I’m itching to get home, but storm after storm is dumping on Northern California, and the ground’s too wet to plant.

I have been shocked at the pervasiveness of invasive broom species in the hills of Marin County where I’m staying.

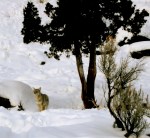
Broom edging a meadow

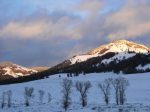
Marin County is unique in ratio of open space.  Since it gets 75% of its water directly from rainfall within the county, the watershed is protected, and Mt. Tamalpais contains 100’s of hiking trails.

Marin County. Gateway to lots of hiking, Mt. Tamalpais, Muir Woods.

I’m staying in an area not far from the main reservoirs.  Koda and I take walks there daily, and in huge tracts of the hills, french broom has completely taken over.  In fact, I can safely say that the broom has become an understory monoculture, crowding out smaller delicates like our Coast Iris, Phacelias, Monkey Flowers, wildflowers, and ferns.

It would take a county work day of the entire population to clear the hills

I’ve hiked and encountered signage saying ‘This is a test area’ to see what works better on the broom–propane torching or vinegar applications.  In the past, volunteer work crews have gone out and using a special tool, pulled up the broom.  We’ve been doing this for years and years in Marin.  But the situation seems out of control to me now.  Marin would have to have a work crew of every man, woman, and child living here for a full weekend and that might not even do the job.

Like the problems with Sudden Oak Death, I have to wonder if our fire suppression policies over the last many years have exacerbated these problems with invasives.  Burning with reburns two to four years later for the sprouts have met with some success.  But given the density of housing in the hillsides, the long term drought, and the dangers of ‘controlled burns’ getting out of hand, fire control probably won’t happen.  And that is too bad, because, once again I’ll say it, the West is adapted to fire.

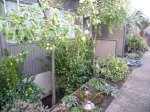
As a testimony to the wonderful adaptations of California plants to fire, look at this Madrone.  One way to simulate fire in native plants i.e. rejuvenate them if they are in your yard, is too cut them back severely.  Here is a Madrone tree that was cut to a stump by the CCC during their clearing of this hillside Madrone forest.

Arbutus, Madrone, resprouts after being cut to ground

You can do this with lots of natives.  For example, one way to rejuvenate woody Baccharis pilularis is to cut it very severely, thereby simulating a fire.  Native grasses enjoy this method as well.

I still feel that loss of natural, frequent, low fuel fires has compromised our landscapes.  Pathogens build up in the soil; invasives take hold more easily; soil depletion occurs due to lack of nitrogen fixing plant material which is first to regenerate after a fire; understory growth has built up providing massive amounts of fuel for hotter, more deadly fires.  Just compare the first photo of the monoculture of broom with the cleared Madrone forest photo.  I can’t be sure but I am guessing that forest was manually cleared because it sits on a ridgeline dividing the watershed open space and a residential section in the canyon below.  It probably serves as a firebreak.

Of course, all the open space can’t be hand cleared.  With the massive build up of fuel in the form of invasive broom, as well as other types of chaparrel that hasn’t burned in years, Californians are preparing for some big fires ahead.

Yellowstone in winter

Planning a trip to Yellowstone?  I recommend the winter!

There are so many reasons to choose winter over summer, but I’ll just give you a few.

First, the lack of crowds.  Yellowstone might get 100,000 visitors a week in the summer, whereas they get that total for the whole winter.

Next, the wildlife.  The wolves are roaming and highly visible in winter.  In the summer they’re attending to their young and following elk to higher grounds.  If you go in February, the wolves are in heat and you might catch courting and mating behavior.  Even better, spring for the cash to stay at the Yellowstone Institute at the Buffalo Ranch in the Lamar Valley and take a wolf class.  You’ll get educated and see wolves.

Elk, Bison, Bald Eagles, Coyotes, Foxes…so much wildlife and it’s mighty quiet with just one road open for cars (the North Road).  All the other roads are groomed for cross-country skiing or snowshoeing, and there are snow coaches to take you to groomed trails.  Although you can travel by snowmobile with a guide, I don’t really recommend it.  It might be fun, but you can do that outside the Park.  Snowmobiling is about tunnel vision, noise and speed–all things that don’t go along with wildlife watching; all things that Yellowstone has to offer.

Thermal features in the winter are amazing.  The deep greens or turquoises shimmer against the whiteness of the snow.  Bison like to hang around the warm grounds.

Several years ago I took a GYC wolf watching tour at the Buffalo Ranch.  We’d get up around 7am every morning, step outside our cabins, set up scopes and watch the Druid Pack of 17 wolves while we sipped our morning coffee.  In the afternoons we hiked or skied.  I stayed a few extra days to ski other parts of the park.  It was some of the best money I ever spent.

Yellowstone in the winter is one of the best kept secrets.

Beetle infested forest–How I would have approached it

View of the forest next to my home last winter

Here is the little forest next to my property last winter

This small forest is almost exclusively spruce.  Springs from higher up feed the area, making it swampy in many places.   The springs are on public land; the forest you see in the photo is on the private lands of several homeowners.  It is a small island of conifers surrounded on both sides by meadow.  The springs run through and feed into Elk Creek, a wetland drainage with willows harboring moose most of the year.

I walked the forest everyday last year.  Many of the spruce were either downed, standing dead, infested or going to be infested.  It wasn’t easy to walk through the forest with so much deadfall.  Yet these spruce were old growth, up to 200 years or more.  The forest harbored at least three kinds of owls, moose, bear, deer, coyotes, turkeys, and lots of birds.  Wolves traveled through on occasion.  Hawks fed on smaller birds and squirrels.  I’d seen weasel tracks.  The forest was alive all the time, and changing.

The State of Wyoming acquired some funds to clear beetle infested areas around structures as part of their fire prevention program.  Homeowners were offered so many dollars to clear around their structures up to several acres.  The homeowners who owned these woods pooled the dollars offered by the State, and with the State Forester’s help, hired a local logging contractor to clear the woods.  It was recommended that all deadfall, standing dead, infested, and larger trees (even if not infested on the premise that they’d soon be infested) be removed.  Aspens were to remain.  Young spruce would remain.  The money was there, now, this year only, so the homeowners decided to do the complete logging job in one fell swoop.   Here is what it looks like today, from the same viewpoint.Same forest this winter after cutting

In the photo below, the area thick with trees on the right is National Forest property.  The left side is the private lands.  One thing to note is that on the National Forest side, although there are some spruce, its steeper (not visible in photo), therefore drier, and has predominately Douglas firs, not yet infested.Public Forest not logged is on the right.  Logged on left are private lands

Closer up

You can see the fence divide between National forest & Private cuts

OK, personally, here is how I would have done it.  First, I’d assume a seven year plan.  I’d use the money available the first year and do the logging by hand, therefore preventing all the compaction and destruction caused by the large machinery.

Around any structures I would have cleared all infested and dead trees, leaving a fire break near the structure.

Next I would have selected ‘red trees’, that is, dead standing trees with their needles still attached.  These trees can be torches and should be removed.

Then I would clear the forest floor by doing burns in place where possible.  The giant brush piles in the photo above will burn so hot that it will take a lot of time for the grass to return.

That would be my priority for the first year.  I would put the forest on a seven to ten year plan of slowly clearing, opening up areas selectively for the regeneration of Aspen and Willows.  The forest certainly needed attention as there probably hasn’t been fires here in over 100 years.  By slowly clearing, animal homes and cover would be saved and new habitat created naturally.   Many animals used this forest as a corridor to travel yet stay hidden, especially moose.  The moose used the shade in hot afternoons after browsing on the willows in the marsh areas below.

In addition, now I can see my neighbors.  This could have been prevented.  Being that none of this forest is on my property, I really had no clout, only an opinion that I voiced.  But the fear of rampant fire seemed to cloud and dominant, as well as the available funding and the recommendations of the State agencies funding the project.

It will take years to regenerate even a little bit of cover.  Eventually, though not in my lifetime, Aspens will take over this area and that is a good thing.  The Willows will come first, but even before that I predict a giant infestation of Canadian thistle that will need to be hand controlled.  By clearing slowly, methodically, with sensitivity, the forest could regenerate at a more natural pace.

Tonight I caught a program on NPR about deforestation in Indonesia.  The Indonesian government has been giving private logging firms the right to log ancient community forests.  The local indigenous peoples are starving without their food source–the forest and its inhabitants.  I listened to a government agent say “This forest is declining and should be cut”.  Then I heard an indigenous leader say “This forest contains small streams that give us water, animals like tigers, orangutans and birds, and other animals we hunt for food, and plants we need for medicine.”  I ask you:  Whom of these two parties knows more about forest management?

Entrance gardens Part 3–The Finished Product

Front entrance view

The small entrance garden is now finished.  (See Posts 1 and 2)   I moved around several existing plants.  I used the existing Mondo grass as fillers and bought 20 more one gallon plants, which we divided to fill even more space.  The garden look good even though it was just installed.  Within a few years the Yuletide Camellia by the front door view will grow upright and hide the fence but not block the beautiful Sangu Kaku maple.

Looking towards the owners side

View from front door. Maple will leaf out; Camellia will grow upright to cover the fence

The trick with the side above was not to have plants look like they are marching in a line against the fence.  There is not much depth there, but enough.  The Daphne at the base of the tree is set forward to the Camellia, as are the red-leafed azaleas.  The art features also help break it up.  Its hard to see, but there are some dabs here and there of different textural low plants to break up the monotony of the mondo grass groundcover.  Some of these are variegated white, other are red leafed oaxalis.  But don’t get too busy or you risk just a confusing mass that the eye doesn’t know how to integrate.

The tenants side next to the fence is more constraining as its very narrow.  I used a Camellia s. that has more flexible branches and is easily espaliered.  We’ll guide that over time to grow against the fence and outward.  One way to achieve that is to use eye screws with thin wire into the fence (more invisible) so you have something to tie the branches to rather than a loud visible trellis.  Over time the branches thicken up and will hold their position naturally.Tenants side by fence is extremely narrow

Tree to the front right will eventually be taken out when shrubbery grows up

Tree to the front right will eventually be removed

Fountain interrupts small wall for an artistic break

Always scope around, use what you can on the property, be creative.   You might find some old garden art you can use, good looking boulders, or useable plants.   Here’s how we used a rotten stump.  Eventually the plants in front will spill over and a 3′ variegated Ligularia is planting in a pocket behind that will peek around.  A Japanese Felt Fern at the base (Pyrrosia) will enjoy climbing up the tree ferns stump.  Tree ferns like their trunk wet so we’ll spray this area.

We moved the mature tree fern into this existing rotting stump

California natives Part 3 Groundcovers…Manzanitas and Ceanothus

In this small series of posts on California natives for the garden, remember I’m trying to keep it simple and successful for the home gardener.  Most of the time when a homeowner asks for a low or no-water garden and I give them what they want, they always over water regardless.  Therefore, in general, unless you know what you’re doing, its better to incorporate natives that will tolerate or even thrive with occasional additional watering.

One of the main tips for growing any kind of native, and most Mediterranean plants in general, is good drainage. California natives are adapted to cool wet winters and dry summers.  When planting natives in general, especially Manzanitas and Ceanothus, the main thing you want to watch for is planting the crown of the plant too low.   A brilliant idea for helping drainage along is to plant that crown on a little hump, maybe 6″ high.  When the crown of these plants stays constantly damp, then rot sets in.  Planting on a slight mound insures some run-off.  Also, don’t put your drip emitter right on top of the crown, and move that emitter every year farther and farther out to encourage roots to grow outward.  Eventually, you may be able to eliminate watering once established.

Both Manzanitas (Arctostaphylos sp.) and Ceanothus are sensitive to over watering, especially true with Ceanothus.  Many Manzanitas on the market have been cultivated to be more forgiving and accept landscape watering.  Two groundcovers I like are Arctostaphylos uva-ursi ‘Woods Compact’ and Arctostaphylos edmundsii ‘Carmel Sur’.  From my personal experience, I have found that the uva-ursi sp., though touted to be more acceptable of hotter weather, are more sensitive than the edmundsii.  I find the Carmel Sur variety to be easy and forgiving.Arctostaphylos 'Woods Compact' right after install

This was an example of a small front yard right after installation.  I did very little soil amending on the thick clay soil.  Instead I brought in about 10 yards of no animal manures (these harbor fungus as they break down as well as heat) composted soil and planted directly in that.  Manzanitas are very susceptible to fungus dieback, and especially the groundcover varieties.  I don’t recommend over head watering for that reason in the summer.  I also don’t recommend a bark or natural mulch as any splashing water can cause fungus on the stems to grow.  So instead here I experimented with a decorative rock mulch.One year laterHere is the yard one year later.  Unfortunately, several years later, this Arctostaphylos ‘Woods Compact’ did experience some major fungal dieback, probably after an El Nino year, and needed some new plants to fill in.

Seeing that I was having more than usual dieback with uva-ursi plants, I switched to ‘Carmel Sur’ and have had more success, although these plants are about 10″ instead of 6″ high.  But the Carmel Sur can take a bit of shade as well as sun, and some summer watering if desired.

I think the larger Manzanitas are easier to grow with less problems than the ground covers. I have had occasional deaths with no warnings, but planted on a hillside, they can take sun or dappled shade with no problem.

Word to the wise:  Don’t forget Manzanitas are browsed by deer!

Ceanothus is the quintessential California native.  There are many beautiful Ceanothus, or California Lilacs, from tiny to tree-like, able to be grown as ground covers or espaliered against a wall.  In general, they are all sensitive to excessive water and crown rot.  Whole books have been written on Ceanothus and I couldn’t begin to cover them here.

Below is Ceanothus g. ‘Hearts Desire’, a gloriosus variety.  Planted 3′ on center, this low growing Ceanothus is deer proof and very attractive.  I’d used in on a small scale with success, but decided to take my chances on a very large hillside installation.  After two winters, the Ceanothus is filling in quickly and nicely.

See how large and steep is this hillside, yet poor drainage

See how large and steep this hillside yet poor drainage. Ceanothus filling in nicely

Below is Ceanothus Hearts Desire in a small yard

Here is another hillside example I used with mixed perennials.  This slope filled in quickly as well and is large scale.

Ceanothus 'Diamond Heights' is right of the fountain.  It has now covered the pebbles

Ceanothus Diamond Hts. right of fountain. Now it has covered pebbles

Below is an unusual newer Ceanothus horizontalis ‘Diamond Heights’.  Use it for accent or in pots and not in the hottest of areas.  This area is irrigated with good drainage.  The Ceanothus is the yellow in front, although now it has filled in completely.

For more information on gardening with California natives, as well as a list of month-by-month native blooming plants, see my eBook Gardening for a Dry California Future.  In it I cover what is a true native, planting natives, more types of reliable natives for gardens, and using mediterraneans in combination with natives.  Also tips on low water vegetable and fruit tree gardens, how to irrigate for low water use, and making the most of your microclimates.

For Gaia lovers

For all you Global Warming non-believers, environmentalists, politicians, city dwellers, pet lovers, gas guzzlers, consumers, cheese eaters, gardeners, youngsters, oldsters, or hipsters, I only have one recommendation for todays’ post:  Read James Lovelock’s new book The Vanishing Face of Gaia.  A Final Warning. Too little, too late, a new hot world is coming, sooner than we think, and we can’t solar or wind-proof our way out of it.  Lovelock says to prepare the lifeboats and come to agreement who will be in them, if that is even possible.  There will be islands of refuge, tiny places, where only at best 100 million of us can survive.

Lovelock’s point is, of course, Gaia; that we’ve failed to take her into account.  That our scientists measure and analyze her like she’s just a predictable rock, rather than a living force that fights back.  That Gaia needs her forests and entire biosphere to keep her running and healthy, and that as humans, our main fault has been overpopulation and therefore overuse.  It’s not that fossil fuels themselves are bad, its that we burn more than She can make.  He makes the point that between all the humans, their pets and livestock, and the engine it takes to feed us, that’s almost half of all the CO2 produced!  We are the sorcerer’s apprentice unable to solve the spell of technology and overpopulation we’ve unleashed.

Lovelock himself is an optimist by nature.  So he looks for hope in the new world we might create while we live in a hotter place, with far less people.

I hope that all he says does not come true, that his calculations are off, that we’ll be able to come together to reduce our numbers, that breakthroughs will occur in practical science to help us.  But his book strangely echoes the words from over 10 years ago of biology teachers  I had.  And it is quite obvious to those who see, that our small gestures of recycling, green goods, wind farms, ‘sustainable living’, or our grand conferences with promises for future reductions in 2050 cannot steer us much off course, if at all.  Lovelock’s metaphor:  “but are these, however well meant, any more than the posturing of tribal animals bravely wielding symbols against the menace of an ineluctable force they do not understand?”

Not a book for the fainthearted.

Entrance Gardens Part 2

The demo is completed.  The new soil has been worked in and the area is clean and ready for designing.  Most important, all my plants have arrived.  I always gather all my plants on site before I begin.  You wouldn’t want to paint a picture without all your colors to chose from?

First I must have my anchors in place in order to work my design.  In addition, I am going to use boulders in the beds, so they are all laid out, ready to select from.

My first anchor is obviously my tree.  The guys plant that first.  I also have them plant my backdrop, which are the plants I’ve selected for the well.  These are 15 gallon Azara dentata, a shade tolerant large leafed fast growing plant that is upright–perfect for this location.  Remember, I will keep the Maytens tree for now, with the intention of removing it when the Azaras fill in.

I place my edging of basalt bricks and then begin placing the boulders, as they will determine how and where I place my larger plants. 

This photo shows my basalt bricks of two different sizes (randomly placed) and my boulders.  Ignore the irrigation hose as we have not yet reworked the irrigation.  There was existing irrigation which, at the very end, we will rework.

Here is my Sangu Kaku Maple.  I am standing at the doorway and looking out.  This area is not at all finished, but you can see how much cleaner it looks already, with the Maple, a Daphne at its base, and a wonderful Yuletide Camellia to the right.  The Camellia is an upright variety that will fill that fence wall without obstructing the view of the maple from down the walkway.  It also blooms in the winter around Christmas.

With the tree anchored, I need to move that Tree Fern (see photos previous post) or it will be in the way of the view of my Maple.  We dig it up carefully, and I have an idea it might just fit in an old tree stump with enough room to walk underneath. If it works it will frame our front doorway nicely.  Let’s try it.

It works great.  Now I have a framework to the left and the right of the entrance to the front door.  And I have anchors for my new design on both sides.  Remember, we’re just beginning the design process on this side of the walk.  We’ll plant ferns and other spillers below the tree fern later.  We’re just getting our large plants laid out and our framework in for now.

Now for the entrance gate.  I needed something to frame the other side.  I had a Podocarpus that wasn’t pruned too badly on the one side, but the left side was empty.  I am not an advocate of same thing both sides, but I am an advocate for balance.  The doorway to the duplex needed framing and needed balance.  Below was my solution with color that popped the plants out.

The ‘Icee Blue’ Podocarpus will eventually grow up and frame the doorway.  While the Pieris is much slower growing and will simply cover the fence.  Remember, I haven’t added any ground cover or finished this bed yet.

On the other side, the tenants’ side, the guys have finished installing the Azaras and we’ve planted the bed.

This is a small bed so designing was quicker.  Also, remember, it was completely demo’d so we didn’t have to move plants around.  The Azaras hide the foundation immediately; I placed the boulders than filled in with variegated Daphne, a purple dwarf Rhododendron and some evergreen Hellebores, with ferns and vinca for accent.  Right away it looks cleaner.  Ignore the hose in the background.  Since the irrigation is not yet connected, we will hand water till the installation is completed.  It is important to keep these new plants irrigated for the first few weeks till they are established.

One last photo will show the line of basalt stones. 

At first I was going to use this edging only part way.  But now I decided to pick up some more stones and continue the edging.  A small Japanese stone fountain will interrupt the line, like it is part of the edging.  I’ll complete this next week. When finished, the stone water basin will have a tiny drip line going into it so it will stay filled with fresh water for birds.  The new White Camellia will be espaliered over time by the gardener–a new gardener that understands plant material.  The variegated Abelia at its base will recover from its balled haircut and form a low umbrella-like edging.  The Preziosa Hydrangea beyond will grow taller and provide that red accent.

Small gardens–Reviving an entrance garden step by step Part 1

I thought I’d do a series of posts as I work to revive a tired garden in Sausalito.  Portions of this entrance I’d worked on over 10 years ago, but because the owner’s gardener had no idea had to do real maintenance, the garden had disintegrated into disrepair.  Portions of the design were still intact, much of the original plant material still useful, but a total rehaul was necessary.

A word to the wise:  I find the most common mistake is a homeowner who’s willing to pay between $20K and $100K to install a garden, yet they’re cheap on the maintenance.  Gardens are not kitchens–you don’t install them and then they stay exactly the same.  Gardens are alive, and a design slowly grows to maturity.  If your maintenance gardener doesn’t 1. have any idea how to care for specific plants i.e. water, fertilizers, 2.  know how a plant grows i.e. prunes everything into a ball and 3. has no artistic sensibility–then don’t hire them.  Spend the extra money on maintenance and your garden will grow into what the designer imagined.  In addition, my best gardens either have me come back every so often or hire my skilled and personally trained maintenance crew.

This entrance garden is a duplex.  I did the owners’ side a dozen years ago and left the tenants side alone.  Now I am re-designing both sides.  Redos are different than blank slate installations.  I usually consider the plant material I want with only an idea of where it will go, then I purchase my plants with the intention of them being like a painters’ palette.  Because there are existing plants that I can move around and reuse, I am ‘designing on the fly’.  So here’s how you can do this at home.  Here are the before photos.

This is the tenants side which hasn’t been touched in years.  Spider plants dominate (they are really an indoor plant and very invasive in warmer climates such as here).  The top photo has some plants in pots, a tired Nandina that will be removed, and two Podocarpus side by side.  We’ll remove one of them and leave the other to frame the doorway.  In the second photo you can see there is a deep well behind the planting bed where the foundation of the house is visible.  That needs to be covered and used as a backdrop for the planted material in the beds.  These are very small beds and, since they are in an entranceway, they can take detail plant material and focal points.

Not easily visible here, there is an old ornamental pear on the other side of this gate.  We’ll remove that.  Once removed there will be additional light, and also the ugly backdrop disappears.  Sky is better than old tree limbs that are dying.Here’s another view of the well behind the spider plants.  We will clean up down below.  There are two different kinds of trees.  The one on the right is a Maytens.  It is stunted, not correctly pruned, and doesn’t fit the space.  The one on the left is an ornamental Evergreen Pear.  Allowed to grow up and correctly pruned, this fits our Japanese look better.  I’ll plant this area with the intention of removing the Maytens as soon as the new plant cover grows up.  Not visible is a very large Monterey Pine and a Live Oak.  These provide a canopy of dappled shade for our new plants.

As you can see by the above view, its crowded.  Your eye doesn’t know where to go, so everything just becomes a ‘mush’.  We’ll create an intimate and more focused space, with more ‘room’ in between the plant material.

This is the owners side that I worked on a dozen years ago.  A large existing tree used to be in the corner behind the fern.  That was taken out several years ago by the owner.  The variegated Pittosporums I installed were never pruned and are now too large and leggy.  We’ll have to remove them completely now.  Much of the finer ground cover like the Luzula aurea in the foreground has been allowed to take over, and the Rhododendrons were not properly pruned and are now large and leggy.  We’ll discard some of the material and use others.

My first consideration in choosing plant material is texture and color of leaf.  In a shady garden, there won’t be a lot of color in the blooms, so I’m going to make choices in leaf color.  I have learned not to mix yellow and white variegation, so choose one or the other.  I’m going to go for white here, with red in places to pop things out.

In looking at the last photo of the owners side, I want to place something at the very end to pop things out, so I chose a Sangu Kaku Japanese Maple, or Coral Bark Maple.  This maple has a red bark year round and is highly attractive in leaf.  But in order to see the maple, I’m going to have to move that large tree fern.  I know this, but haven’t yet figured out where it will go.  That will happen on site, during the design process.

On the tenants’ side, I’ll remove all the plants, except the white flowering Azalea and one of the Podocarpus’.  Since this is a contained bed, here’s our chance to totally revamp the soil.  We’ll remove up to 8″ of soil and replace it with a good Rhododendron/acid mix.  In addition, if you notice in photo 1, the tenant’s side of the fence has a very small bed, much smaller than the owners’ side.  The soil is rocky there with a lot of roots from trees.  We’ll give ourselves extra room by shoring up the bed with some Japanese looking basalt ‘bricks’.

I chose a palette of Daphnes, variegate Pieris, ‘Icee Blue’ Podocarpus, Ophiopogons, Rhodies, red leafed Kurume azaleas, Preziosa Hydrangea (they have red leaves), variegated Abelia, variegated Vinca minor, some Rubus, purple-leafed Oaxalis, Japanese painted ferns and native Blechnum spicant ferns.

In my next post I will show you the installation in progress.

“We were home”

In her book When the Land was Young, Sharman Russell works a sensitive exploration of North American archaeology today.  She visits and talks with archaeologists on site.  The book is written more as poetic prose than dry hard science.  Here is one of my favorite excerpts:

Vance Haynes is here today mapping a well he thinks was dug by the Clovis people. ‘They had the same gray matter as you or me’, he says.  ‘They were at a different stage in their technology, that’s all.’

The second question is like hitting a bruise, the pain of our postindustrial angst. Was it better?  In the last two centuries we have had small but diverse groups of hunters and gatherers to study.  Some had lots of leisure time; some didn’t.  Some starved  on occasion; some hardly ever.  Much depended on the physical environment.  Still this doesn’t touch the heart of the question, which is about spirit not matter.  Was it better emotionally?  Were we better?  Were we more alive, more human, more engaged?

Anthropologist Robin Fox says yes.  He mourns the ‘Paleoterrific’ not because it was better but because it is where we belong.  There we reached ‘the limits of our evolutionary adaptation’.  We were few in number, tribal, creative, dependent on nature, in awe, in touch, in our natural setting.  We were home.


California natives part 2- Ribes sp.

One of my favorite native flowering three season plant is Ribes or Gooseberry.  You may have read my post on White Blister Rust on our native white bark pines.  Ribes are a host for this European fungus.  Large scale attempts to eradicate western Ribes sp. in the early 20th century was the method of control, but luckily it failed.

Ribes sp. are very beautiful and diverse.  In general the berries are edible, although some species are better tasting than others.  Gooseberry fruits were extensively used by Native Americans.

There are three species of Ribes native to California that I use all the time.  The first is Ribes sanguineum.  There are many varieties out on the market, with colors ranging fro white to pink to red.  R. sanguineum needs a bit of water in the summer and does better in either a cool sunny location or, in hot areas, a little shade in the hottest time of the day.  Flowers in the spring, berries in the fall that the birds love, and beautiful fall color makes this plant have 3 season interest.  A shrub, it grows anywhere from 6′ to 10′, depending usually on the amount of water and the site.  Prune it after flowering.

When correctly sited, this plant is very tough and easy to grow.  One of my favorites in the garden.

Another Ribes rarely used is Ribes speciosum.  This unusual California native flowers in the dead of winter and goes dormant (leafless) in the summer, making it perfect for planting under oaks.  It likes shade or cool sun.  You can keep it green all year by watering it in the summer, but why bother.  One note is that it does have thorns so keep it away from walkways.  Many of my clients say this is one of their favorite plants because it flowers in the winter when there is little color.

Lastly is a Ribes that forms colonies and blooms yellow.

Ribes aureum is from the foothills of California.  It tends to sucker and form thickets, when happy.  It does best in shade with moderate water in the summer.

There are several other more obscure Ribes on the market, but these three are my favorites and all are reliable and attractive.  These are very easy native additions to your dry garden.